How to Measure for Your Wedding Veil
Three simple measurements for a veil crafted to perfection.
Creating your bespoke veil begins with a precise, thoughtful approach, ensuring the design aligns effortlessly with your dress. Every veil I create is tailored entirely to you: your gown, your proportions, and the story you want your embroidery to tell. To achieve this, I rely on three measurements that allow me to cut your veil to the perfect length and silhouette.
The wonderful news is that you don’t need to wait for a dress fitting, nor do you need to have your gown physically with you. Each measurement can be taken at home in a matter of minutes, or gathered easily with a quick call to your boutique. Below, you’ll find a simple guide to each one.

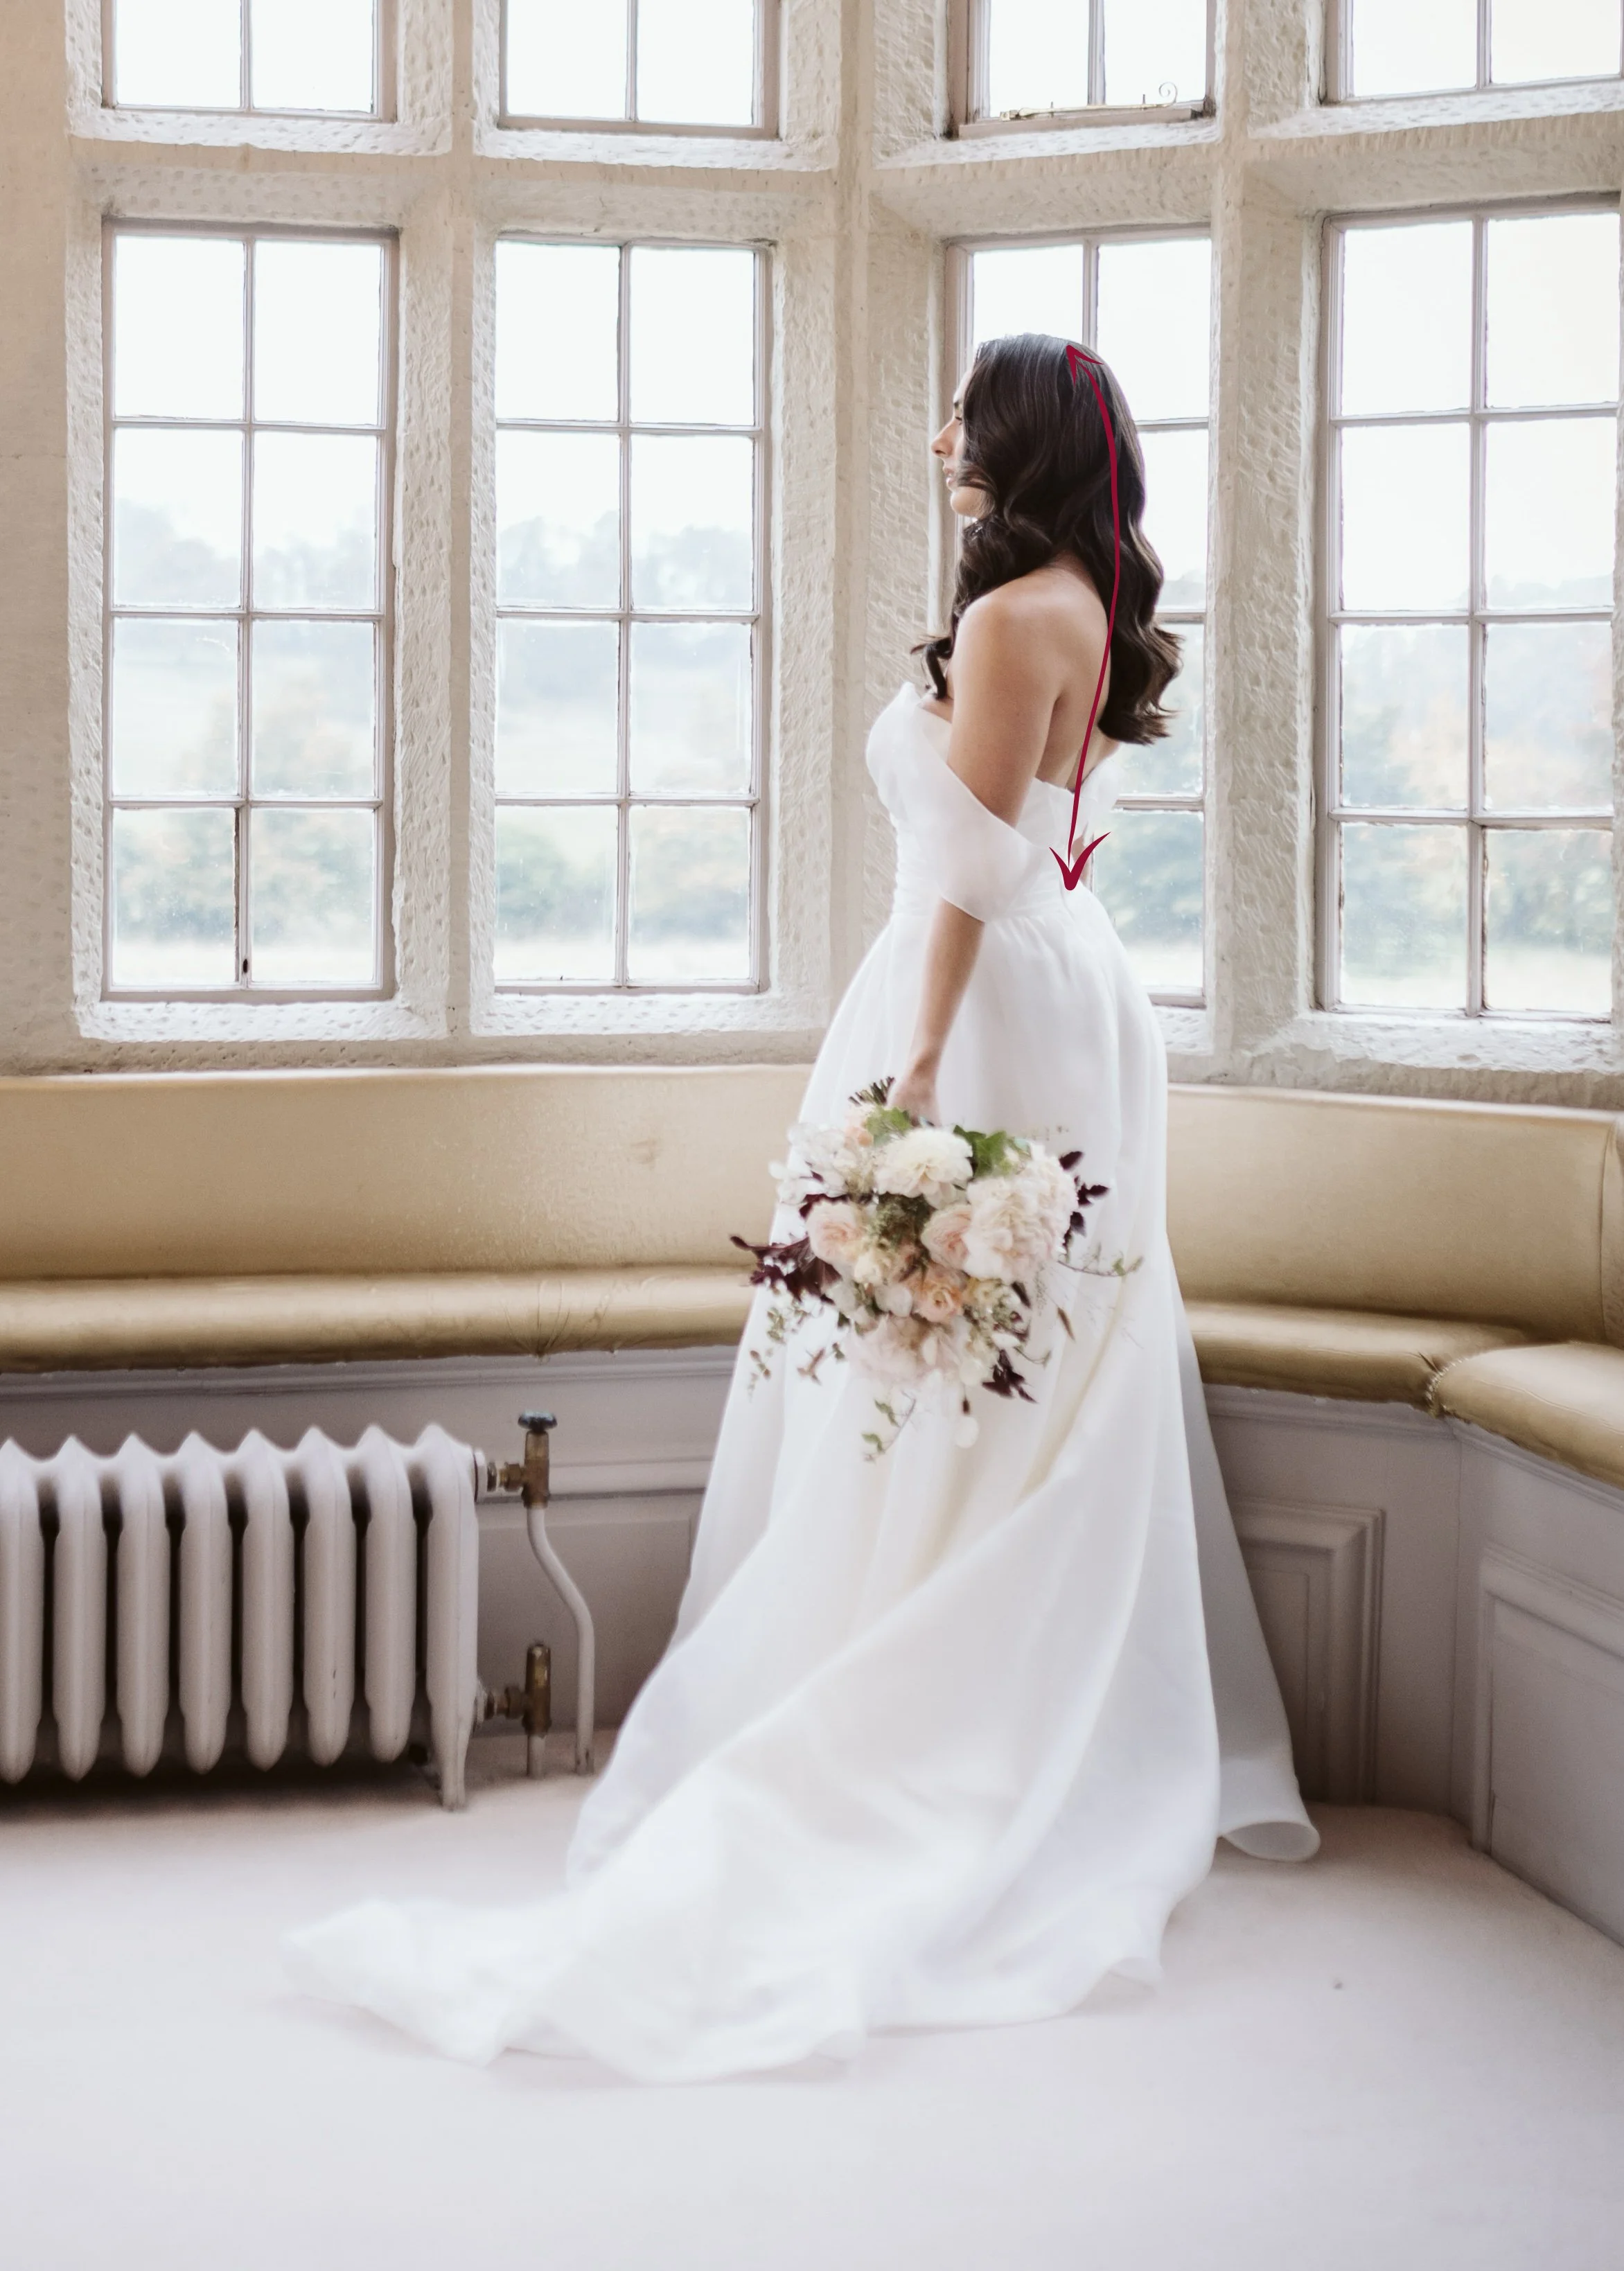
1. Crown of Head to Waist
This measurement (added to your train measurement) tells me exactly where your veil will fall in relation to your gown, ensuring the proportions are beautifully balanced.
How to measure:
Stand naturally, shoulders relaxed. Using a soft measuring tape, measure from the point where your veil will sit — usually the crown of the head — straight down the centre of your back to your natural waist. If possible, ask someone to assist so the tape sits smoothly and accurately. You do not need to wear your dress for this, as your natural waist will provide enough information.
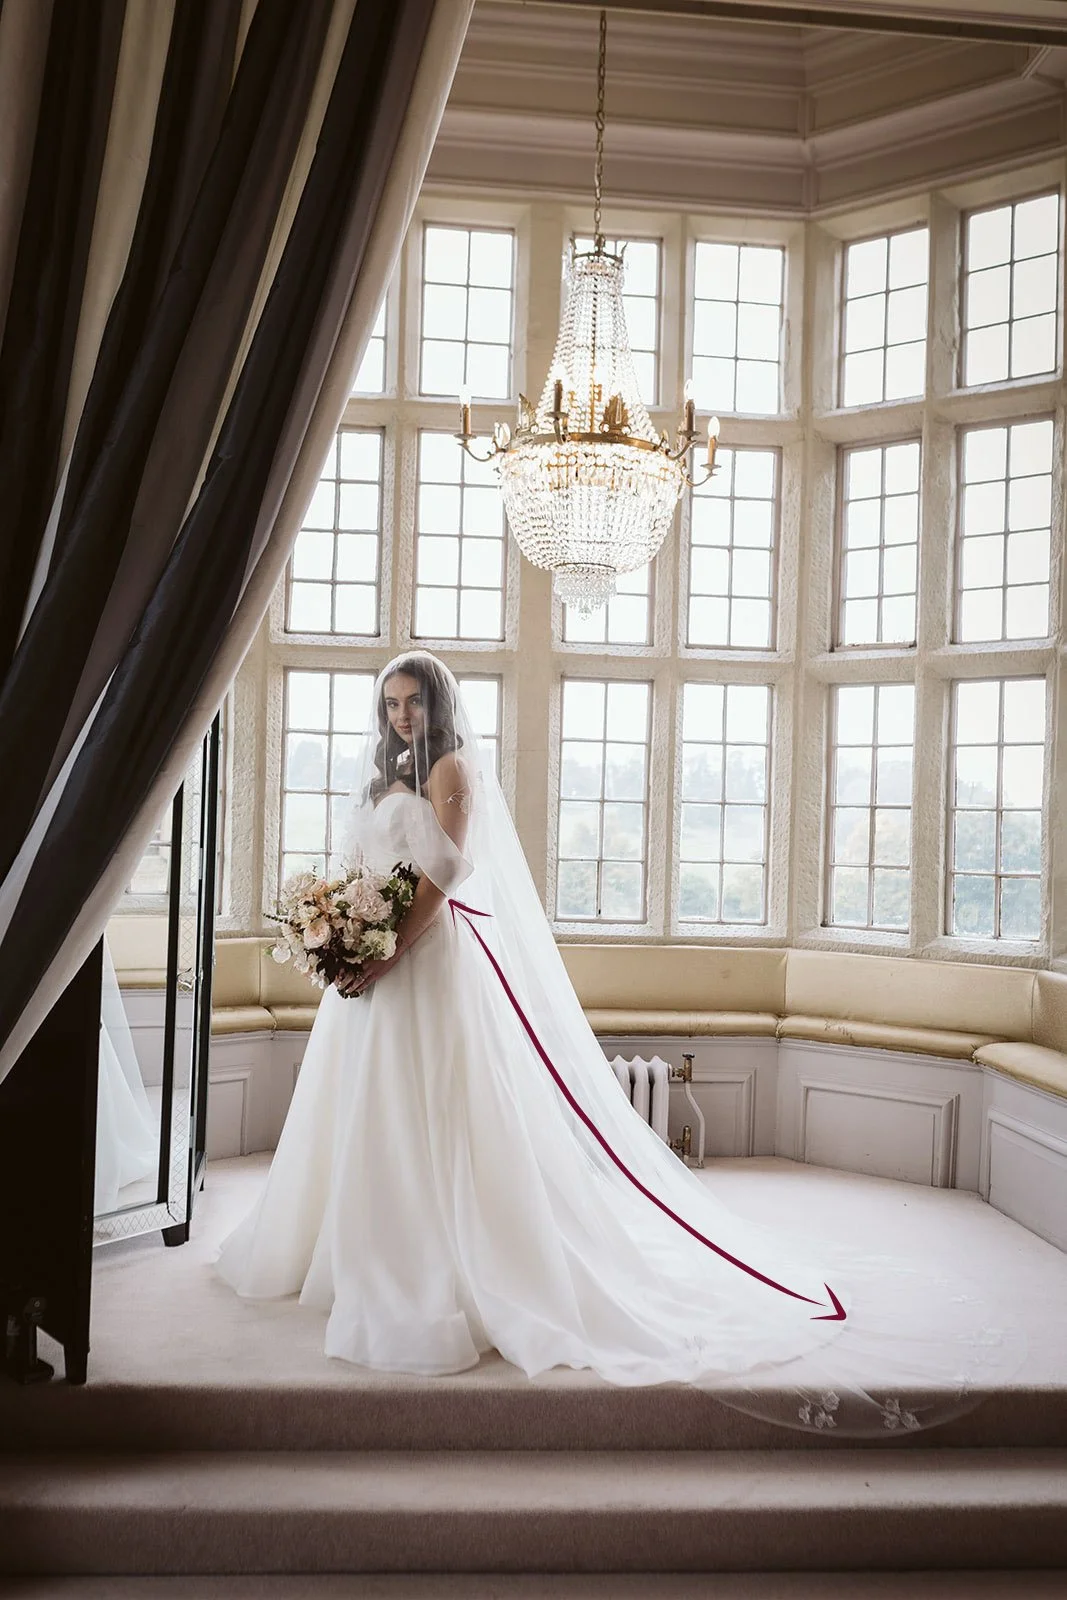
2. Length of the Train (Waist Seam to Hem)
I will add this to the first measurement to determine how far your veil should extend beyond your gown to achieve a soft, sweeping line.
How to measure:
If your gown is at home, lay it flat or hang it carefully. Measure from the waist down to the very end of the train. This does not require you to put the dress on.
If your gown is still at your boutique or with your designer, simply contact them — they will be able to give you this measurement, and you do not need to be present.
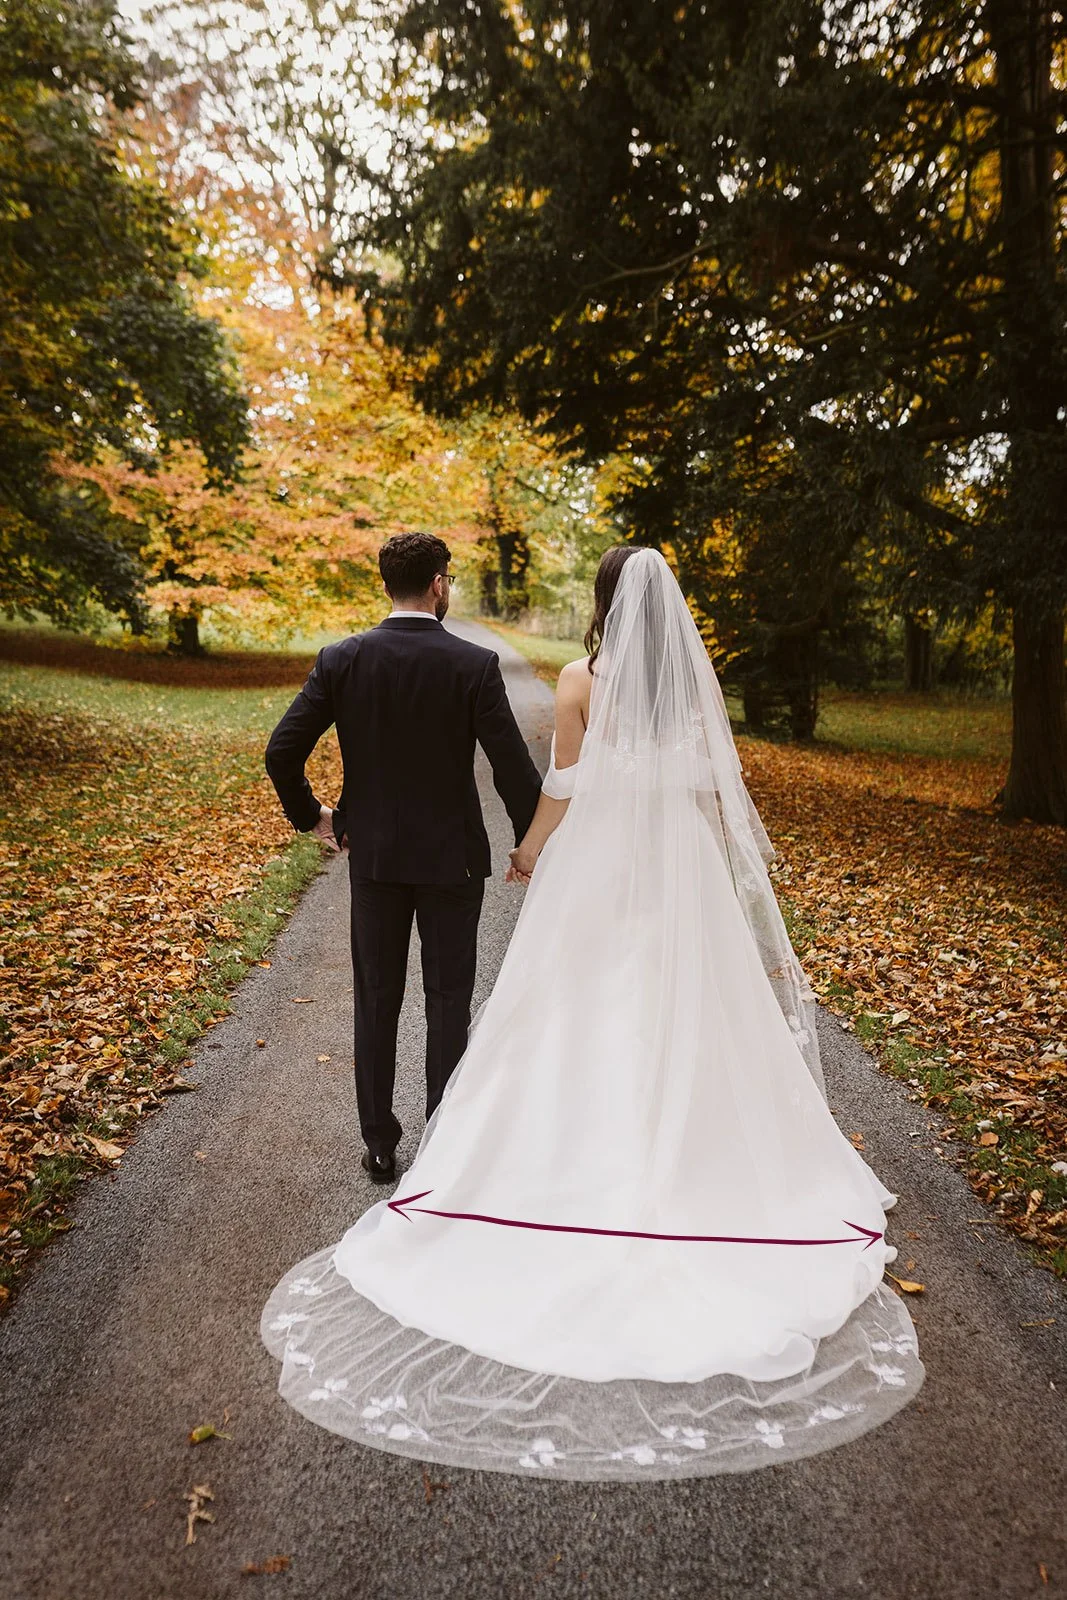
3. Width of the Train at Its Widest Point
The width of your train is what allows me to shape the veil so it drapes effortlessly around your gown, without overwhelming it or appearing too narrow.
How to measure:
If your dress is at home, lay the train open and measure from one side of the widest point to the other.
If not, simply ask your boutique — they can provide this measurement for you.
Crafting the Perfect Proportions
With these three measurements, I can cut your veil so it complements your gown with intention and artistry. As a starting point and if you are having a long veil, I typically recommend that your veil extends around 12 inches beyond the hem of your dress. This creates a gentle, elongated silhouette and allows the embroidery to be seen clearly.
Of course, this is only a guide — if you envision something more dramatic, more sculptural, or more ethereal, we can absolutely explore longer lengths.

No Fittings, No Delay — Just Ease
A common assumption is that a veil can only be designed once bridal fittings begin. In reality, everything I need can be gathered long before then. This means your veil can be planned, sketched, designed, and even created without waiting for appointments — perfect to allow for an unhurried and enjoyable veil experience!
I’m Here to Help
If you’re unsure about any of these measurements, or would simply like reassurance that you’ve taken them correctly, please feel free to reach out. I’m always here to guide you.
Love,
Hannah. x

All images by Hannah Brooke Photography